Monday, February 28, 2011

Donald Duck Layout

I love Disney! We haven't been there in 2 years and these pictures are from longer than that so I am loving looking back and remembering the fun times!


Photobucket

Close up of the Duck:

Photobucket

The Duck was cut big... that is my 'biggest' tip (LOL). The older carts have lots of layers and cutting them bigger is better and easier to get a nice looking finished piece.

The embossed paper was purchased like that a few years back. I have a large stash of Disney embellishments and papers because I knew we would be visiting many times and will have many pictures to scrap.

Hope you enjoyed this layout as much as I did!
Sunday, February 27, 2011

Blog Hop coming!!

Photobucket

There will be a blog hop on March 4-6! I have a bunch of great bloggers lined up!! There will be prizes and amazing projects to share too!! I hope you will join us next weekend!!!

Wednesday, February 23, 2011

Swagbucks

Search & Win

I love saving money! I don't know if you do but I really do!! Lately I've been using Swagbucks to earn gift cards to Amazon. You can basically buy anything off of swagbucks including scrapbooking supplies!!! If you sign up before February 28th and enter "BirthdaySaving" in the swag code box (on your home page) you will earn 80 swagbucks! (450 gets you a $5 gift card!!)

The best way to earn points is to install the tool bar on your internet browser. Then use it to search like you would use google. I have personally earned over $30 in Amazon gift cards with very little effort!

Click on the link above to get started!!

Thursday, February 17, 2011

February Blog Spotlight!

Remember back when in January when I said I wanted to spotlight a few of my favorite blogs? Well I am hoping to do one a month! This month I am featuring Sweet n Crafty Treats by Erica. Let me tell you how happy I am that she just came back to blogging! She is my real life cousin and one of the best crafty people I know!! I hope you will pop over to her blog and give her some love!!

Thanks again for stopping by!!

Wednesday, February 16, 2011

Pink and Red ATG

I already had a red atg gun that I bought a long time ago at Framingsupplies.com . I decided this year that the price of acid free adhesive was too high and I started doing research. The non-acid free is much cheaper. So I thought why not get some of each? I then knew I needed another gun but wasn't going to get the expensive red one again. But they now make a pretty pink gun!

So I bought a pink atg with my 50% off coupon at Micheal's.


Photobucket

I am going to put the acid free tape in that one and make my red one non-acid free.

You can check out my post on my red atg and get a link to a video that shows you how to load it. I have to say this is by far the cheapest adhesive and the strongest I have used!

Thanks for looking and have a great day!

Monday, February 14, 2011

Valentine's for the kids!

So at the last minute I decided to make the kids Valentine's for the class. These are the bags with the notepads and cards I made for the teachers. I also added hershey kisses.


Photobucket


Close up. All Stampin Up Stamps.


Photobucket

The little purses I made for the girls. I used Forever Young for the boxes and Sweethearts for the hearts.

Photobucket

The stamps were some I had laying around.

Photobucket

Close up of the purse. I filled it with Candy. Honestly this was a bit ambitious! Took me a few hours. And I kinda wimped out because I didn't make the boy's Valentines but used the leftovers from last year for the them.

Hope you had a great day and enjoyed the holiday!!

Oh and guess what my hubby bought for me???


Photobucket

Yes I am entering into the world of Gypsy FINALLY!! My cousin had picked up an extra when they were on clearance and gave me a good price. I am new to it and my cricut is taking a little vacation so I will be using it more in a few weeks but I am SOOO happy and excited!!

I also got to go to Micheal's and get a Pink ATG and some more adhesive.


Saturday, February 12, 2011

A Child's Year First Birthday Card

I've wanted to make this card ever since my dh bought me this cart (a long, long time ago!)

I used my cuttlebug to do the diamond embossing on Kraft cardstock from stampin Up. The 1 is popped up with stampin up dimensionals. Stampin up is used for everything except the ribbon.

Going to my nephew's first birthday today and this will be his card. It was super quick to make and I managed to pull it out in about 25 minutes. It also helped me work towards my goal of using all my cricut cartridges at least once this year!! LOL!

Also wanted to add about my upcoming blog hop. I've had several people interested and I would love to have just a few more join in. If you would like to join in see this post for the information.

Hope you are having a wonderful weekend!

Wednesday, February 9, 2011

My Poor Cricut E

So my poor Expression is going on a trip! Since I received this replacement cricut it has never cut circles/0's correctly. I finally got around to calling Provo Craft tonight and they are going to send me a refurbished E. This is of course great news and I must say I am super thrilled with Provo Craft for standing by their product. (I really love them and I have a ton of products from them and hope to add more this year!)

Now for the bad news.... their policy changed and now you have to ship your E to them and them the process and ship you a new one. Which means there is about a 3 week turn around. So I will be without a cricut for 3 weeks!!! What will I ever do? I know for a fact I will be crafting with it for the next few days to get stuff ready for the next few weeks. So have no fear I will still have projects posted but at some point I might have to get creative. We shall see!!

I must say I am loving having my blog back up and getting back into the groove of crafting as often as possible with a 3 month old. I have big plans in the future for this blog and my crafting in general. So have no fear I won't be falling off the face of the earth again. LOL!!

Monday, February 7, 2011

Blog Hop..... Are you interested?

I am wanting to do a blog hop sometime in the near future. Looking for a few people to join in and get their blogs featured.... email me at : lisarup1@aol.com (with blog hop in subject) if you would like to join in. My requirements are:

1) you have a blog
2) be willing to make a project and post all the blog hop info on your blog including links to this blog for the start and links for the next stop.
3) that you be willing to offer some sort of blog hop candy (that can be as big/small as you like and you can have your own requirements for how entries are drawn/determined. You only have to close it when the hop is done)

I don't belong to any groups anymore or any design teams so this would be a chance to participate. Please let me know I think this can be a lot of fun!!

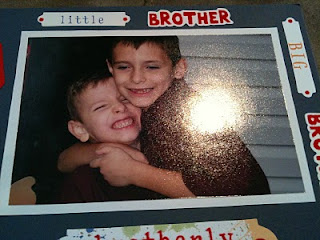
Brothers layout

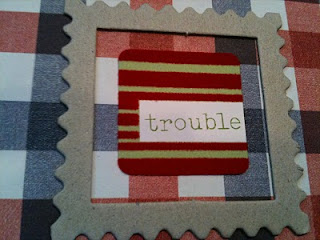
I love this layout! I used stickers I've had laying around for awhile now. I'm determined to use up my stash this year so I can buy new things. This layout was so simple! The plaid paper was from my scrap pile. I added some naked chipboard frames to some stickers to create a page element.


Naked chipboard frames a sticker.


Close up of my cutie boys!!


Thanks for viewing my layout!! Have a great day!!

Sunday, February 6, 2011

Super-bowl Sunday Green Bay Packers Onsies and tshirts

Happy Superbowl Sunday!! We live in NJ but my husband is a HUGE Green Bay Packers fan. (He even went to see a game in the freezing weather!!) So to surprise him I decided make some shirts for our boys. I plan on dressing them after church today.

I bought this iron on transfer a few years ago at walmart (I'm sure they have more or something similar)


Photobucket

then I selected images online and printed them out. BE SURE TO USE 'MIRROR IMAGE' IF YOUR IMAGE HAS TEXT!!


Photobucket

Then you trim the images.

Next: Set up iron to hot and iron the plain shirt to heat it up:
Photobucket

Put the images down and iron on following manufacturers directions on time.

Photobucket

I allowed my shirts to cool then peeled back the transfer.

Big Boys shirts:
Photobucket

Jace's shirt:

Photobucket

Hope you have a great Superbowl Sunday!! I think it will be a blast at the Rupertus house with my Husband so excited. The boys are Eagles fans but also like Daddy's team too!

I just want to mention how inexpensive this project was! If I had to buy shirts it would have been at least $14 a pop for the boys and who knows what a custom onsie for a baby would be! Gotta love being crafty!!!

Saturday, February 5, 2011

Another Valentine's Card using Create a Critter

I love Owls! My Mom collected them and I think I collect scrapbooking supplies with Owls because she liked them so much. This card was made from Create a Critter.


The stamp was a Studio G stamp from last year. Perfect for Valentine's Day!


The Valentine's Day stamp was from a set and the other two are Studio G stamps. I personally love the Studio G stamps. The are super cheap and work really well is you use Stazon ink. Alot of people talk on their blogs about the 'quality' of stamps but I really don't have a problem with this brand at all.

Now did you guess who this card is for? It is for my sweet hubby!

Hope you enjoyed all my Valentine's Day projects this week! I have been doing tons of layouts and have them scheduled to pop up over the month of February. Still trying to keep with 52 posted projects this year!!

Thanks always for looking and commenting!

Friday, February 4, 2011

Valentine's Day Create a Critter Card

This was my actual first project with Create a Critter. Did I mention before how much I love this cartridge?

When I was pregnant with my youngest I joined a Mommy message board to have some people who could relate to all my 'aches and pains' of being pregnant. So now that the babies are born we have a mommy group. For Valentine's Day they paired us off and the 'babies' get to send Valentine's to each other. Well, Jace got a little girl named Aryssa. This is the card we are sending her.


Sorry the main pic is so blurry... my silly camera isn't good half the time.
the paper is from the $1 section at Target last year. I added glitter to the phrase and the ladybugs tummy. Also chalked the cheeks to give a little more personal touch.


Inside I used two separate stamps. The top one is from Stampin Up and the bottom was from some set I have... not sure who makes that one. I did the little icon on the ladybug page for a accent. So cute!!

Hope you enjoy this projects! I know I did!!

Thursday, February 3, 2011

Valentine's Day Create a Critter Cards

My husband bought me this cartridge for Christmas and I am only now getting to play with it. I have to say it is my absolute favorite cartridge! Everything has cut beautifully and layered just as nice!!

This is a cute little squirrel. I chalked him up a bit to add dimension to the brown colors. The plaid paper was a scrap and then the backside of it was blue. So I flipped it and pulled out one of my punches from ek success that had a little heart border. I ended up doing it on both sides and voila' it looks like ribbon!!!

So the squirrel is for my son Xander on Valentine's day. I will give each of the boys a little candy treat too!


Next I did a koala bear and used the same pattern/layout for each of the cards. This is for my oldest Austin because he is a bear collector. (Each of my kids has a 'theme' animal. Austin is bears, Xander is dogs and Jace is monkeys.)


I know they are not traditional Valentine's colors or themes but for my two boys I think it is perfect. I don't think either would be thrilled if I made them a pink hearted card! LOL!

Thanks for looking and commenting!

Wednesday, February 2, 2011

Valentine's Day Teacher Cards

Here are the cards I plan on sending in to each of my kids teachers.


I used the cricut cartridge Forever Young for the silhouettes. That was the 2nd time I've used the cartridge and I think it is perfect for anything girly! The paper was from target's $1 section last year. (using up my supplies!!) The 'love' stamp is one of Heidi Swapps. I think I've had that for over 3 years and have only used it once. I added two prima flowers layered with a skittle that had been dyed with alcohol ink.


The inside is a sentiment stamp from Stampin Up and the heart is one of those cheapy stamps from the craft store.

I hope you enjoy these cards!

Tuesday, February 1, 2011

Valentine's Day Teacher Gifts

I bought a bunch of these notepads at a yardsale last summer. They were 10cents a piece. I knew when I saw them I could use them for gifting.


I took some Valentine's Day paper I got last year at Target's $1 spot and wrapped it around each note pad. Then added a silver ribbon. I stamped the heart and cut it out. Added the 'thanks' stamp and a prima with rhinestone in the center. Pop dots were used to apply the heart to the note pads.


Tomorrow I will post the cards I made to go with these notepads. I plan on giving them to each of my kids school teachers for Valentines Day.